Interfacing a Raspberry Pi with a Radio Controlled car was on my list
of projects so I need to experiment with powering the Pi from
batteries. I had a number of basic requirements.
Saturday, May 17, 2014
Running The Raspberry Pi On Batteries
This is a wider topic than High Altitude Ballooning – there are
many applications where operation is needed away from a mains supply –
so I thought it would be good to describe my approach to the problem.
Using a webcam with the Raspberry Pi
There is a lot of recent motivation to do image processing and computer vision tasks on the Raspberry Pi.
Luckily OpenCv is already built on Raspbian and Wheezy.
Luckily OpenCv is already built on Raspbian and Wheezy.
Use the Raspberry Pi Serial Port to Connect to a Device
This example shows how to create a connection
to a serial device, write data to the device, and read data from the
device.
Thursday, May 15, 2014

Control your Raspberry Pi robot from a web-connected device
Last issue we built a Raspberry Pi robot. This issue, we’ll create a Python web application that lets you control your bot using a first-person view
Connect Rasp PI to LED light
1: A single LED
Before we even get started with the GPIO, lets make an LED light up by simply wiring it to the +3.3v supply and 0v.
Using MySQL on a Raspberry Pi
SQLite is a great database for many situations, but there are times
when it's not quite up to the job. SQLite can be used in web sites, but
it's much more common to use MySQL. This is because
- MySQL is more scalable,
- MySQL can be tuned more easily,
- it supports user management and permissions,
- MySQL is better for sites with heavy traffic,
- it can be used in client server architectures where a database client must access a database remotely.
How do I supply power through the GPIO?
By the looks of the schematic the GPIO pins are connected to +5v Rail; I have copied part of the input schematic on the USB power. In this sub section the +5v supplied from the USB connector is filtered to give a nice stable 5v supply to the 5V0 Rail. |
How To Install / Use The Raspberry Pi Camera

In this step by step guide we will
explain how to install the Raspberry Pi camera module, along with how to
take pictures/videos with it.
How to set up WiFi on a Raspberry Pi
Although the Raspberry Pi Model B comes with built-in 100Mbps wired
Ethernet, it can also use WiFi via a USB dongle. The Model A doesn’t
come with Ethernet at all, so using a WiFi adapter is a good way to get
networking on that model. In both cases, simply plugging in a supported
USB dongle and doing a simple bit of configuration will give your Pi
access to wireless.
Wi-fi on Raspberry Pi, a simple guide
Since the Raspberry Pi comes only with a wired network, it could be
useful for lot of us to get it wi-fi ready. Wi-fi on Raspberry Pi can be
achieved with little effort and at cheap expences.
We do only require a compatible wi-fi dongle, and the best candidate for the job is the Edimax EW-7811Un.
We do only require a compatible wi-fi dongle, and the best candidate for the job is the Edimax EW-7811Un.
Controlling two DC motors with Raspberry Pi and the L293D dual H-bridge motor driver
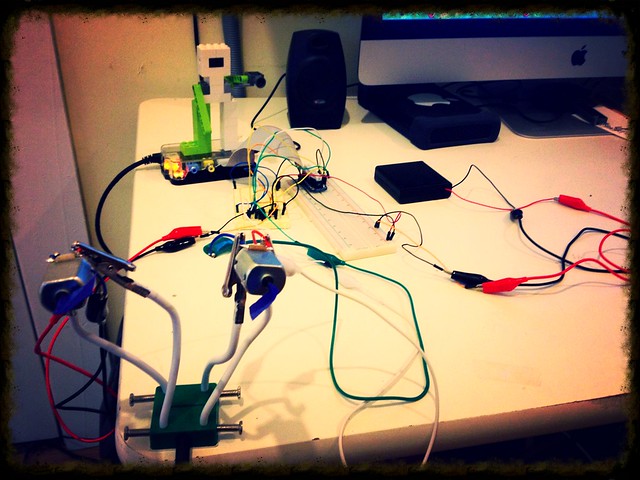
In order to move our Raspberry Pi powered rover, we will need at least two DC motors to power a left and right set of wheels. The motors will be used to move the rover forward and reverse, as well as rotate left and right.
Top 10 Things to Connect to Your Raspberry Pi
During my time with the Pi I’ve experimented with various devices and
sensors. Here is my Top 10 list of devices to connect to the Raspberry
Pi. In most cases they are very cheap and easy to interface and are
great building blocks for more complicated future projects. I’ve
included links to more detailed posts where I can and many of these
include example Python scripts to help you get going.
From robot cars to security systems there are plenty of ways of combining these mini-projects into some amazing creations! If you need to buy a present for a Pi owner then these are good starting point.
From robot cars to security systems there are plenty of ways of combining these mini-projects into some amazing creations! If you need to buy a present for a Pi owner then these are good starting point.
Raspberry Pi – Driving a Relay using GPIO
There’s something exciting about crossing the boundary between the
abstract world of software and the physical ‘real world’, and a relay
driven from a GPIO pin seemed like a good example of this. Although a
simple project, I still learned some new things about the Raspberry Pi
while doing it.
There are only four components required, and the cost for these is around 70p, so it would be a good candidate for a classroom exercise. Even a cheap relay like the Omron G5LA-1 5DC can switch loads of 10A at 240V.
There are only four components required, and the cost for these is around 70p, so it would be a good candidate for a classroom exercise. Even a cheap relay like the Omron G5LA-1 5DC can switch loads of 10A at 240V.
Controlling a stepper motor with the Raspberry Pi and Piface
Do you know how to make a Raspberry Pi controlled stepper motor (see link above)
Here is a simple project that only needs a raspberry pi, pi face, python, jumper wires, and a stepper motor-that's it!
Here is a simple project that only needs a raspberry pi, pi face, python, jumper wires, and a stepper motor-that's it!
Controlling DC Motors Using Python With a Raspberry Pi
In this tutorial I will show you how to connect some motors
to your Raspberry Pi. Doing so will allow your Raspberry Pi to interact in the
real world, making it possible to build a robot, turn on a fan on a hot day or
even drop a treat for your cat or dog while your away.
RPIO.PWM, PWM via DMA for the Raspberry Pi
RPIO.PWM provides PWM via DMA for the Raspberry Pi, using the onboard PWM module for
semi-hardware pulse width modulation with a precision of up to 1µs.
With RPIO.PWM you can use any of the 15 DMA channels and any number of GPIOs per channel. Since the PWM is done via DMA, RPIO.PWM uses almost zero CPU resources and can generate stable pulses with a very high resolution. RPIO.PWM is implemented in C (source); you can use it in Python via the provided wrapper, as well as directly from your C source.
RPIO.PWM provides low-level methods to control everything manually, as well as helper classes that simplify PWM for specific usages (such as RPIO.PWM.Servo). This module is currently in beta, please send feedback to chris@linuxuser.at. As of yet only BCM GPIO numbering is supported.
How to use GPIOs on raspberry pi (Simple I/O, PWM and UART)
How to use GPIOs on raspberry pi (Raspbian-Wheezy)
Taka a look at the GPIO header information of the raspberry pi, you can find it in the next links:
http://elinux.org/RPi_Low-level_peripheralshttp://elinux.org/RPi_BCM2835_GPIOs
Note: The GPIO assignment for the raspberry pi is different between revision 1 and 2.
Do not use voltage levels greater than 3.3V, Raspberry pi doesn´t support 5V and doesn't have an over-voltage protection.
Subscribe to:
Posts (Atom)